Yesterday I spent my afternoon at Spazio Gnu,
a shared photography space in Turin, Italy.
As someone who spends a lot of time working with digital tools (mostly
programming, photo editing, and video editing), stepping into a space
where there are no "undo" buttons or history states was a refreshing shift.
For this session, I used a DURST M700 enlarger, along with a box of FOMA Fomaspeed Variant 311 High Gloss RC paper (8x10 inches), some rolls of home developed film, a pack of Ilford Multigrade filters, and a few trays of chemicals.
I ended up walking away with a total of 8 prints, which I consider a solid outcome for a first attempt at silver gelatin printing.
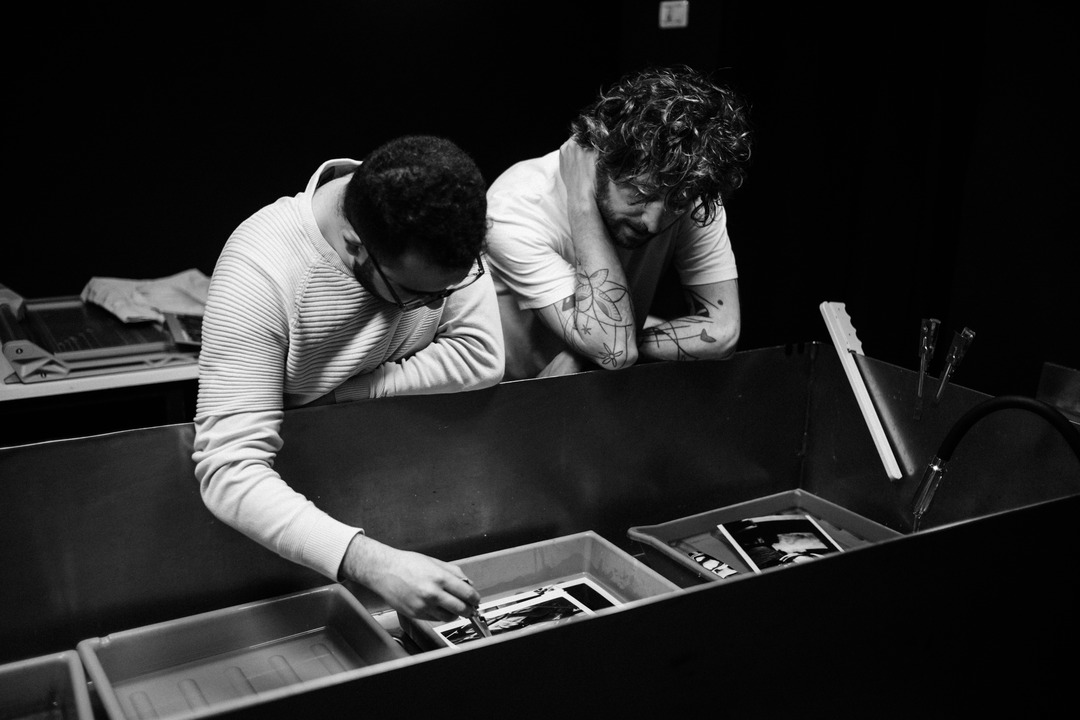
Spazio Gnu's darkroom is organized into two (and an half) areas:
- A dry area, where you have the enlargers and the workbench to handle the negatives and the paper.
- A wet island at the center of the room where you have water and trays to develop the prints.
- A drying area with a roller dryer to speed up the drying process.
The process of making a print requires a lot of patience and attention to detail.
One of the first steps is to mix the chemicals. Chemicals used in the darkroom are typically divided into three categories: developer, stop bath, and fixer.
- Developer: This chemical makes the latent image appear on the paper. I used ILFORD MULTIGRADE developer, mixed at a standard ratio of 1+9 with water.
- Stop Bath: This abruptly brings the development to an end and prevents contamination of the next bath. I used ILFORD ILFOSTOP at a 1+19 dilution.
- Fixer: Makes the image permanent. ILFORD RAPID FIXER, mixed at 1+4.
Before committing to a full sheet of paper, I made a test print to find the correct exposure. By using my hand to cover part of the paper, I exposed the sheet in 5-second increments (from 5 to 25 seconds), creating a gradient of exposures on the same strip. Examining this test print allowed me to estimate the correct exposure for the final image. I ended up choosing 15 seconds as the optimal base exposure.
Because FOMA 311 is a variable contrast paper, I also had to select the right filter to achieve the desired contrast. The ILFORD MULTIGRADE filters range from 00 (very soft) to 5 (very hard). I predominantly used a grade 2 filter, which produces a good range of print tones for an average negative.
On one of the prints, the subject was rendering a bit too dark, so I decided to experiment with a technique called "dodging." Dodging involves using your hands or pieces of card to hold back light from selected areas of the print during exposure. By physically blocking the enlarger's light over my subject for a few seconds, I was able to lighten them and bring out more detail in the shadows.
After exposing the paper, the real magic happens in the wet area.
I slid the paper into the developer tray. While the image begins to appear almost immediately, the print needs a full 50 seconds in the developer to fully mature. Then, using tongs, I transferred it to the stop bath and rocked the dish for about 30 seconds. Finally, it went into the fixer to make the image permanent. (While ILFORD notes fixing takes only 30 seconds in fresh solution, I left mine in for about a minute to be safe).
After a quick wash in running water to remove any residual chemicals, I ran the prints through the roller dryer.
Holding 8 physical photographs that you crafted entirely by hand is a highly rewarding experience. Each print has its own unique character and subtle imperfections, adding to its charm. Seeing an image slowly emerge in the developer tray is a tactile experience that no digital workflow can replicate.